I was totally inspired by an upcycled foldable tray table / coffee table I spotted on Pinterest. However, I’m not a coffee fan (sorry coffee addicts!), so I had to make some adjustments to make the idea my own. Tea was the next logical subject.
What You Need
Before explaining what my steps were to upcycle the table, here’s what you need (alongside an old beaten down foldable tray table of course!):
- Sanding Paper 150-grit
- Stenciling template
- Stenciling brush
- Black paint for stenciling
- Brush for staining
- Stain – I’ve used the colors mahogany and grey
Please protect yourself while sanding. Wear goggles, gloves and a mouth mask.
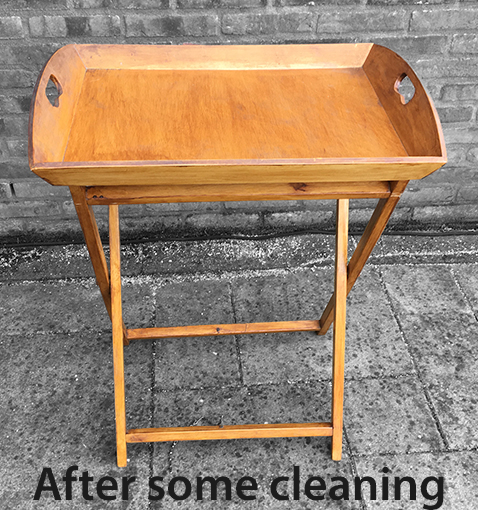
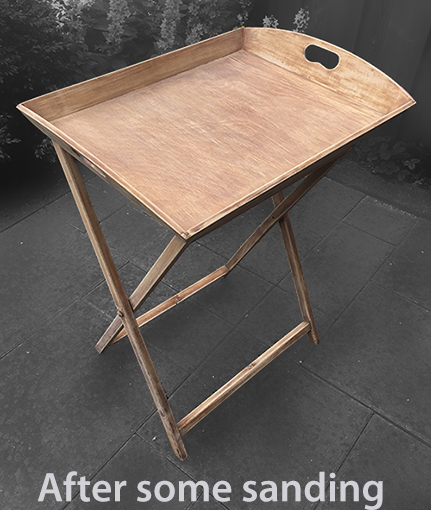
Good Bare Bones: Give The Tray Table A Clean And Sanding
When I first got the tray table, it really needed some TLC. It was sticky, dirty and had a broken chain. I cleaned it with the usual household cleaner. However, cleaning it wasn’t really making the difference I wanted to see, so I sanded it down. Now it was ready for a new look!
Create Or Use Default Stencil Templates
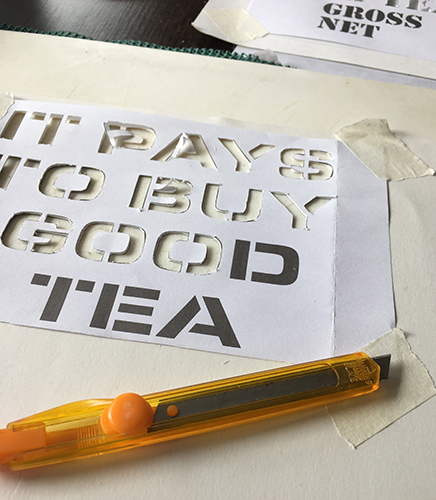
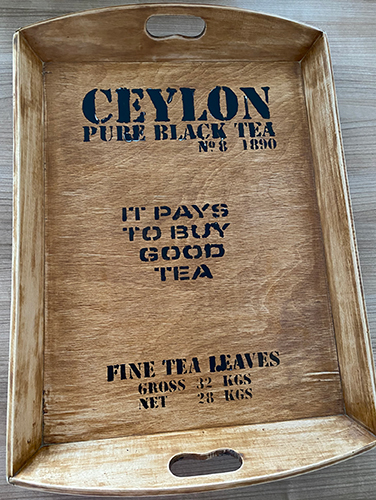
I wanted to make it look like the main tray could be from an old wooden chest. You know those beautiful old boxes used for boat transport, a long time ago. Unfortunately, I couldn’t find any standard stencil templates I liked enough for the text. So, I created my own by printing out my own fonts and cut them from some thin cardboard. The texts are available for download.
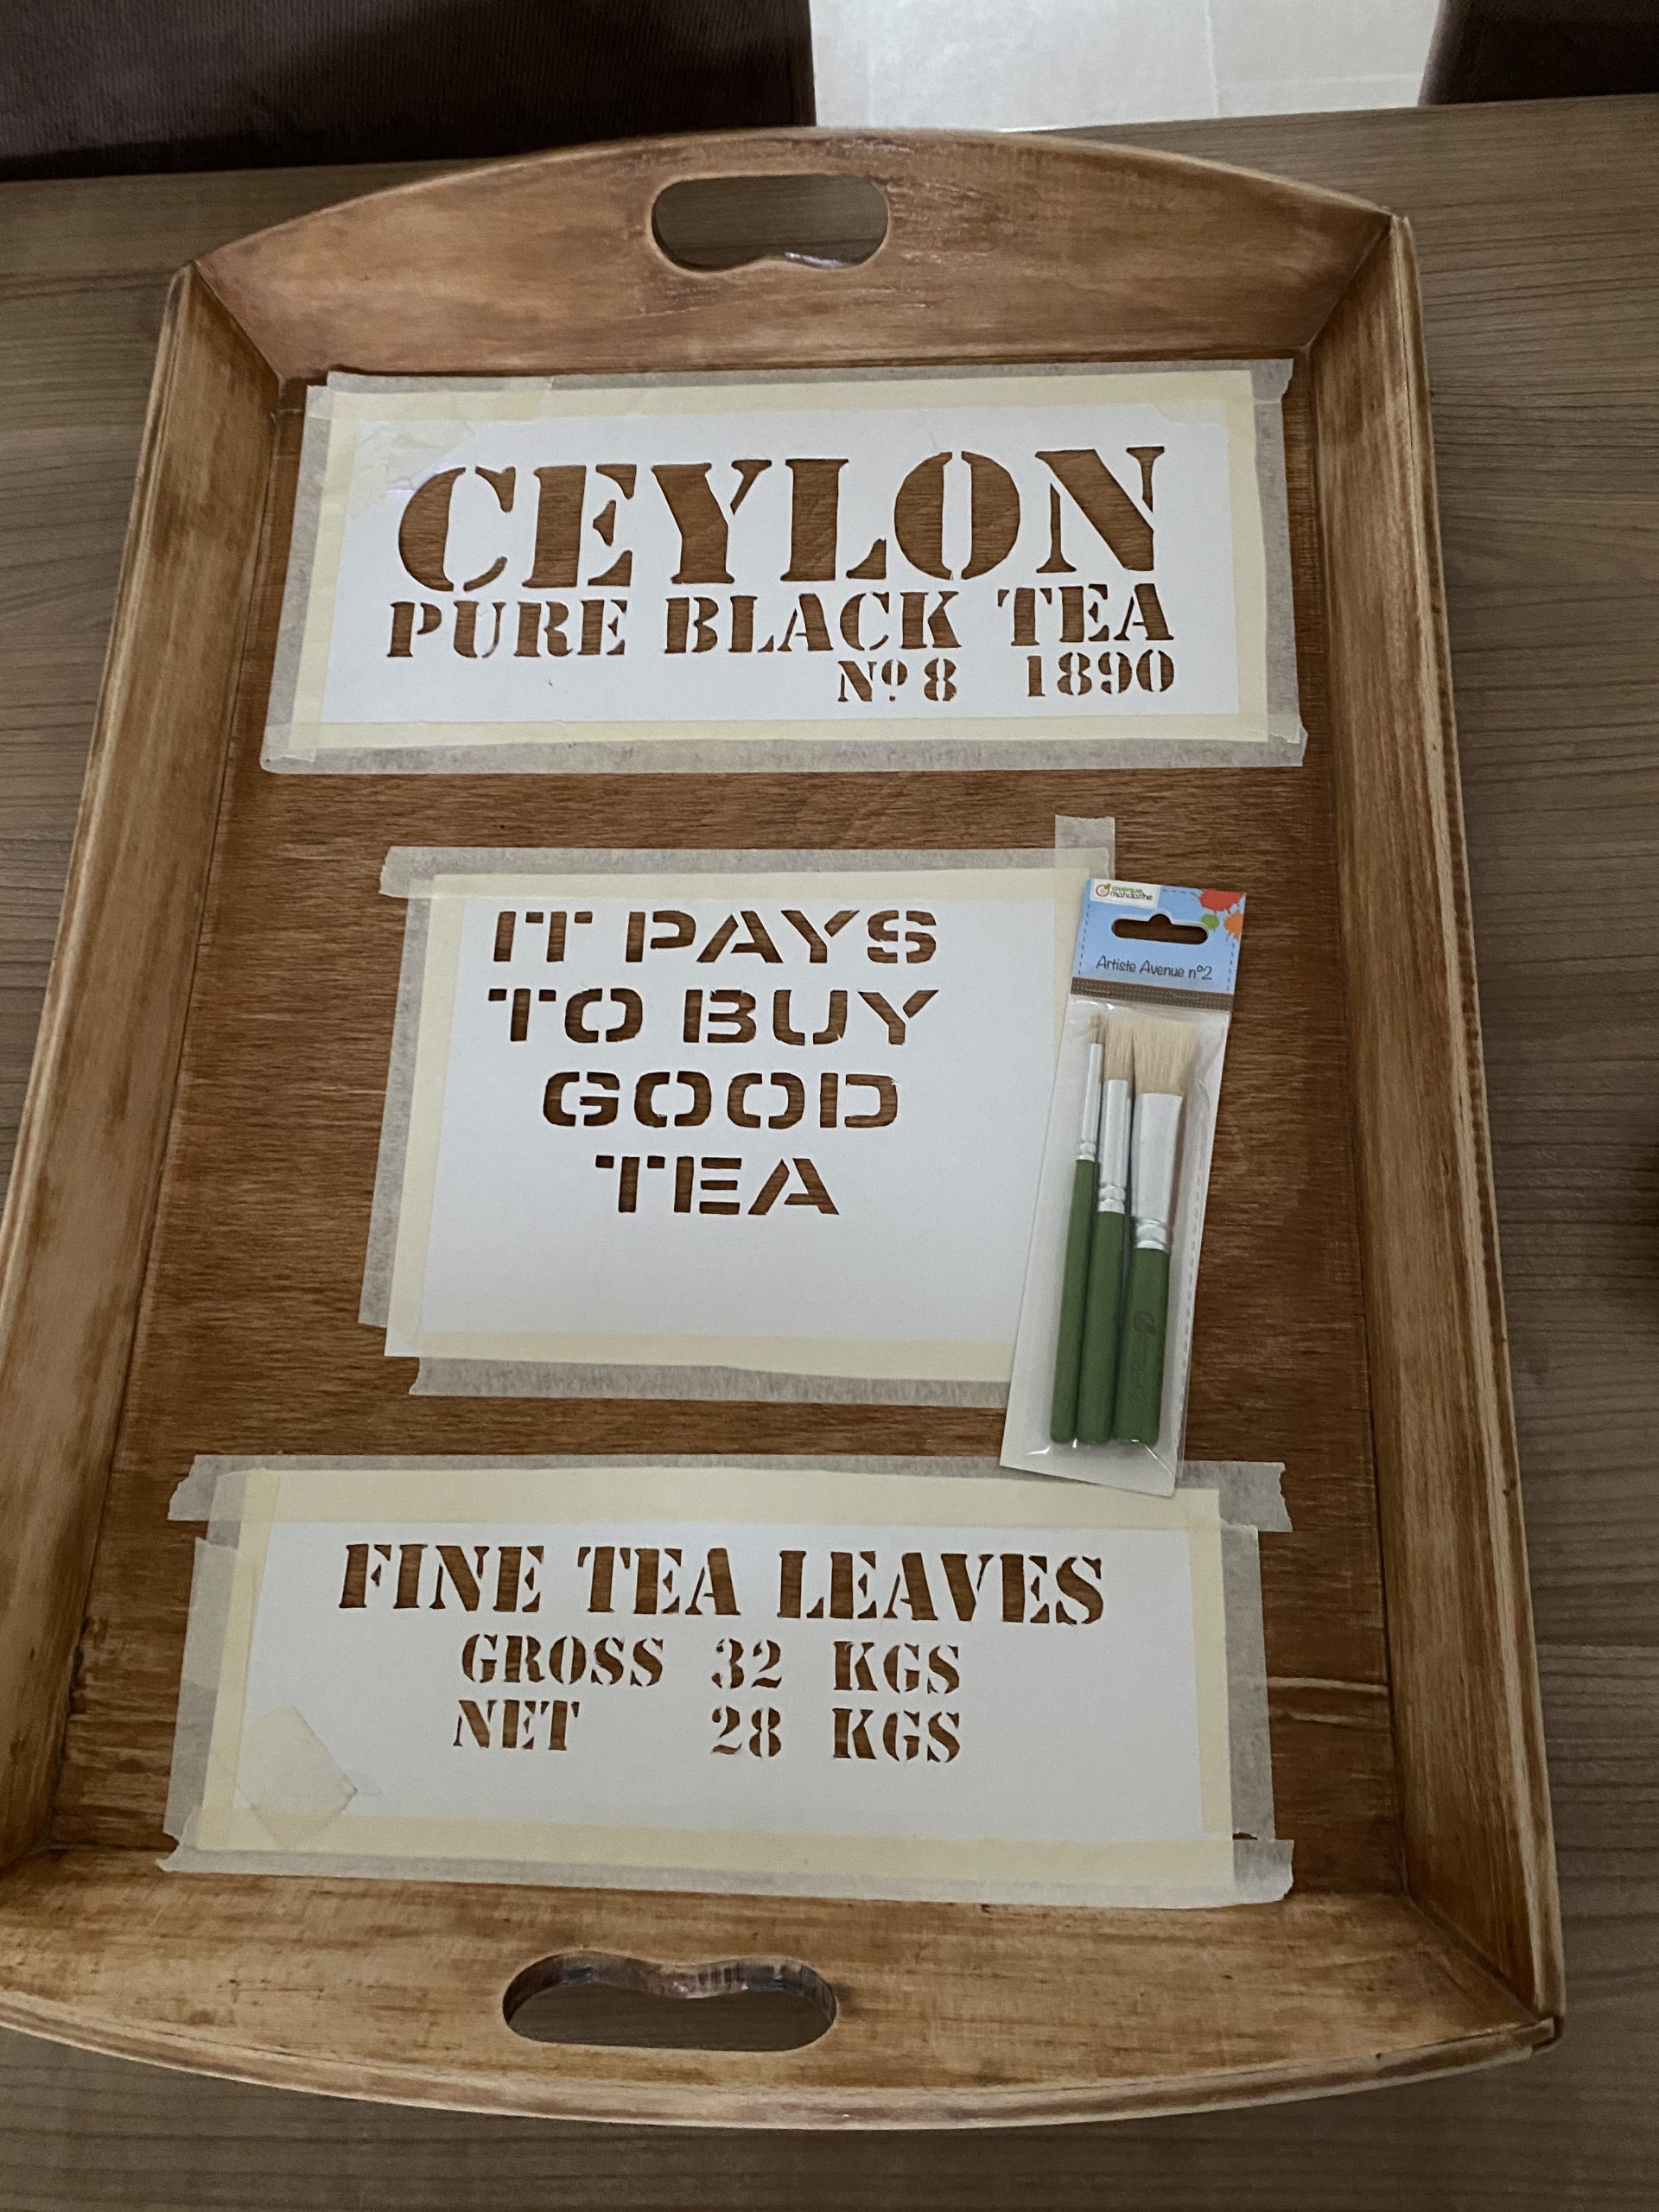
Stencil Away!
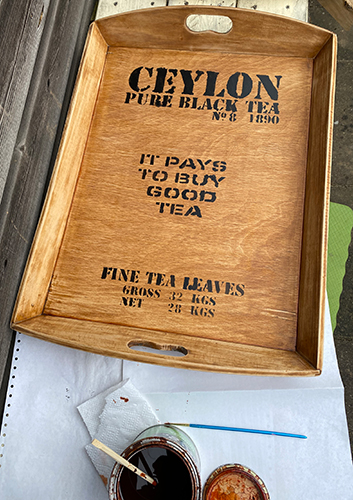
Even though I used a special stencil brush, I have to admit I used the wrong black paint. I knew the paint would bleed (leak under the template). For me, it wasn’t a problem, because I wanted the tray to look old – In old times, the text wouldn’t be perfect either. However, it also glued some of the paper to the paint, which I had to scrape off.
After stenciling the text on the tray table, I also created a little border. I just hand painted that with a small brush.
Stain, Sand, Stain
Then, the most challenging part began: Staining! I wanted a warm, but weathered wooden look. So, I played around with mahogany, grey and a various mixed of the two. One color was not an option. After all, something old shows some wear and tear, as well as loss of colour. I stained, sanded, stained again. Anything to make it look imperfect. The whole thing turned out darker and glossier than expected, but it grew on me since.
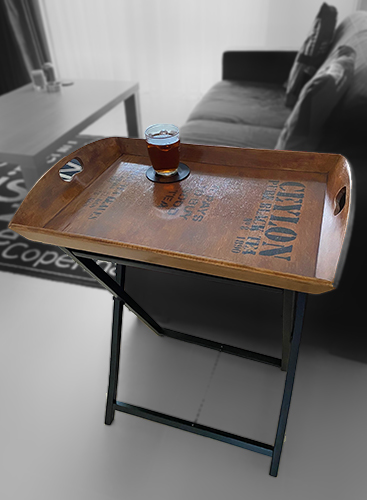
My Foldable Tray Table All Done!
I painted the legs black. Here’s the finished look and how it’s put to good use.